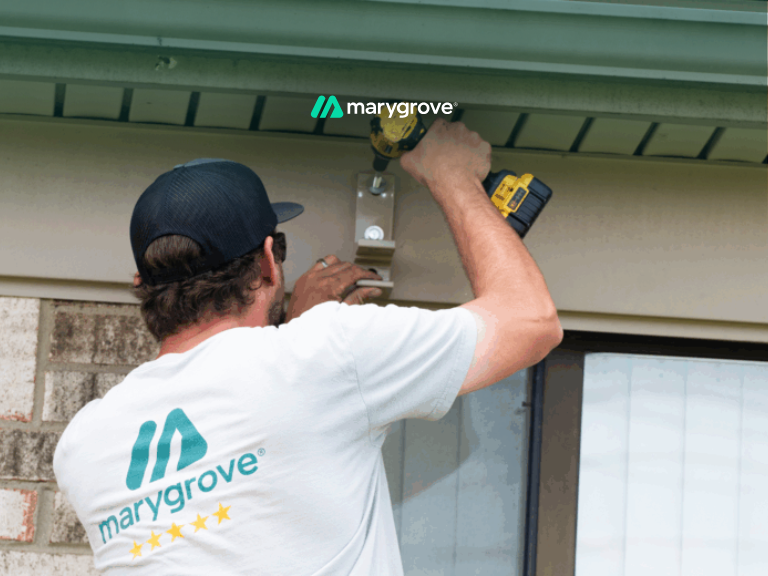
Most professional awning installations take about 2–4 hours to complete. Custom projects may take 4–6 weeks from consultation to final setup, depending on design complexity, materials, and mounting requirements.
Understanding the Full Timeline of Awning Installation
Installing an awning is one of the quickest ways to transform your patio, deck, or backyard into a shaded, comfortable space.
For most homeowners, the process can seem tedious, but is often completed within a single afternoon.
The timeline depends mainly on the awning type, mounting surface, and whether the setup is standard or customized.
Quick Breakdown:
- Professional installation: 2–4 hours for standard retractable or motorized awnings
- Custom-built awnings: 4–6 weeks from consultation to final install
- Commercial setups: Usually completed within one business day
- DIY installations: Often take longer and risk alignment or safety issues
A professional crew handles everything, measuring, wiring, and final testing, ensuring your awning performs perfectly from day one.
Whether it’s for dining, relaxing, or hosting friends outdoors, understanding these timelines helps you plan confidently.
And if you want to know what can influence those hours, and how to make sure your project stays on schedule, keep reading till the end.
From First Bolt to Full Shade: What Happens During Awning Installation
When most homeowners plan to add an awning, they expect a quick process, and usually, it is.
Skilled installers can transform a patio or deck into a shaded retreat in just a few hours. Still, timing varies based on the awning’s type, size, and level of customization.
Knowing what happens during installation helps you plan confidently from consultation to that first moment of shade.
Average Installation Time
For most homeowners, installation day is refreshingly short. Standard retractable or motorized awnings usually take about 2 to 4 hours for a trained crew to install.
This includes site setup, mounting, wiring, and full operational testing before the team leaves.
For custom-built awnings, the process may take 4 to 6 weeks from consultation to completion.
This longer timeline mainly applies to projects with unique measurements or imported materials, ensuring every detail fits your home perfectly.
Meanwhile, larger commercial or multi-unit installations often take an entire business day.
These setups may include multiple awnings, integrated lighting, or motorized systems that require more precision and coordination.
Step-by-Step Awning Installation Process
While the full process might sound technical, it’s highly structured and efficient.
Every phase builds on the last to ensure the awning is stable, aligned, and ready to perform in all seasons.
- Site Assessment: The process begins with a detailed site evaluation. Installers measure the area, locate studs or rafters, and assess the wall or roof structure to confirm the best mounting method.
- Preparation: Before installation, homeowners are asked to clear outdoor furniture and décor, creating a safe workspace. Installers also check for available power sources if the awning is motorized.
- Mounting Brackets: The brackets form the foundation of the system. Professionals align and secure them precisely to avoid future issues like sagging, leaks, or uneven tension.
- Awning Mounting: The frame and awning are lifted and attached to the brackets. This step typically requires two to three installers for accuracy and safety, especially for larger models.
- Electrical Connection: For motorized awnings, this step includes wiring for remote controls, smart sensors, or voice automation. It’s completed by a qualified technician to ensure safety and code compliance.
- Calibration and Testing: Installers extend and retract the awning several times to confirm smooth operation, correct pitch, and optimal shade coverage.
- Cleanup and Orientation: Finally, the team removes debris, reviews maintenance steps, and walks you through operation, warranty, and care recommendations.
When everything is done, the transformation is instant.
The space that once baked in the afternoon sun becomes an inviting retreat for family dinners, weekend gatherings, or quiet reading hours.
Now that you know what installation day looks like, it’s time to explore what can influence how long it takes, and how to keep the process running smoothly.
Factors That Can Speed Up or Slow Down the Process
Most awning installations finish in a few hours, but not all projects move at the same pace.
Some take longer because of the awning’s size, mounting surface, or even seasonal timing. Knowing what affects installation helps you plan ahead and avoid unnecessary delays.
Size, Surface, and Setup
Every installation is unique, and the time it takes often depends on three key elements: the awning’s size, the surface type, and any added features.
- Awning Size: Larger or heavier awnings require extra lifting help and careful alignment. Smaller residential units, however, can often be completed within just a few hours.
- Mounting Surface: Concrete or brick walls add drilling and anchoring time, while wood or siding installations are faster. Reinforced brackets protect materials like vinyl siding.
- Electrical Add-Ons: Smart sensors, LED lights, or new power outlets can add 30–60 minutes. These small additions enhance convenience through automation and remote control.
Together, these details shape how long your installation takes.
With a skilled crew, most adjustments happen seamlessly, keeping your project right on schedule.
Weather and Season
Outdoor installations depend heavily on weather and timing. A few environmental and seasonal conditions can influence when your project is completed.
- Weather: Rain, strong winds, or freezing conditions can delay work for safety. Professional installers reschedule quickly to protect both your property and the equipment.
- Busy Seasons: Spring and early summer are high-demand periods. Scheduling during late summer or fall often means shorter lead times and faster service.
- Permits or HOA Approvals: Commercial or multi-unit projects may require approvals. These add waiting time, even when installation itself takes just one day.
Working with an organized team helps minimize these effects and ensures your awning is installed as soon as conditions allow.
DIY vs Professional Installation
Installing an awning looks simple but requires skill, strength, and precision. Most delays happen when homeowners try to tackle it themselves.
- Common Challenges: DIY attempts often lead to crooked brackets, damaged siding, or unstable mounts. Without the right tools, even minor mistakes create big setbacks.
- Safety and Technique: Awning frames are heavy, and improper torque or angle adjustments can cause serious alignment or drainage issues. Professionals handle this with ease.
- Professional Advantage: Experienced crews manage uneven decks, complex surfaces, and shifting weather safely. They use reinforced mounts that prevent cracking or long-term wear.
Hiring professionals keeps the process fast, safe, and reliable, ensuring your new awning is ready to enjoy the same day it’s installed.
Next, let’s explore how simple preparation and planning can make the entire installation experience smoother and even more efficient.
How to Plan for a Smooth & On-Time Awning Installation
A little preparation before installation day can make the entire process faster and more efficient.
From clearing the workspace to coordinating with your installer, small details ensure your new awning is set up safely, neatly, and right on schedule.
Preparation Tips to Keep Installation on Track
Most installations go smoothly when homeowners take a few simple steps ahead of time. These small actions save installers time and help avoid delays once the crew arrives.
- Clear the Area: Move patio furniture, décor, or grills to give installers plenty of room to work safely and efficiently.
- Confirm Power Access: For motorized awnings, make sure a working outdoor outlet is nearby to connect the motor and test controls.
- Keep Pets and Kids Safe: Secure pets and children indoors while tools, ladders, and electrical work are in progress.
- Check the Weather: Even light rain can delay outdoor electrical work. Keeping an eye on the forecast and staying flexible with rescheduling helps things move along smoothly.
These quick steps create a safe, clutter-free workspace so installers can focus entirely on the setup, not moving obstacles.
Taking these small steps keeps your installation running on time and stress-free.
And when every detail is handled by experts who value precision and service, that’s where the real difference begins.
Helpful Resource → Retractable Awning Installation Checklist
The Marygrove Advantage

Behind every smooth awning installation is a team that understands precision, timing, and care.
At Marygrove, we’ve refined our process to make every project efficient, transparent, and easy for homeowners from the first call to the final shade test.
We Help You Choose the Right Awning
Each project begins with professional measurements and guidance.
Our experts help you select the ideal size and frame type for your patio, deck, or outdoor space, balancing shade, function, and style.
Design Support That Fits Your Home
Whether you prefer modern tones or classic neutrals, our design specialists assist in choosing the perfect fabric, color, and accessories.
The goal is simple: an awning that looks beautiful and performs flawlessly year after year.
A Streamlined, In-House Process
Marygrove manages everything internally, from design and fabrication to installation, so there are no third-party delays or communication gaps.
You’ll work directly with our trained team every step of the way.
Clear Pricing and Scheduling
We believe in transparency. Once your design is finalized, you’ll receive a clear estimate and firm installation date.
Most projects move from consultation to completion faster than expected.
For over 90 years, Marygrove has built a reputation on craftsmanship, consistency, and trust.
We don’t just install awnings, we help homeowners create shaded spaces where comfort and connection come naturally.
Helpful Resource → How Much Do Retractable Awnings Cost in 2025? [Full Pricing Guide]
Turning Hours into Years of Comfort
An awning installation might take just a few hours, but the comfort it adds lasts for years.
From faster installs to weather-ready designs, choosing professionals ensures your project runs safely, efficiently, and exactly on time.
With the right planning and expert installation, your outdoor space can go from sun-drenched to perfectly shaded in a single afternoon.
Ready to get started?
Schedule your Marygrove awning installation today and experience the most reliable, seamless, and service-backed installation in the industry.


