A retractable awning can be securely installed on a brick wall by inspecting brick quality, using proper anchors, drilling with precision, sealing mounts, and ensuring alignment. For veneer walls, tie into structural framing to prevent loosening or damage over time.
How to Install a Retractable Awning on a Brick Wall: Quick Essentials
Installing a retractable awning on brick takes precision, planning, and the right tools. Here’s what you need to know upfront:
- Inspect your wall: Check if it’s solid brick, veneer, or hollow-core, and repair cracks or weak mortar first.
- Use correct anchors: Sleeve or wedge anchors for solid brick; epoxy anchors for hollow brick; tie into studs for veneer.
- Pre-drill properly: Use a hammer drill, clear dust, and avoid over-forcing to prevent brick damage.
- Seal and flash: Protect anchor points from water with masonry sealant and flashing.
- Align brackets evenly: Keep spacing level (every 3–4 feet) to prevent strain on awning arms.
- Adjust pitch: Set to roughly 14 degrees for smooth water runoff and stability.
By focusing on these steps, you ensure a secure mount that won’t compromise your brickwork or performance.
A properly installed awning also creates a comfortable shaded spot that’s perfect for outdoor dining, weekend get-togethers, or simply enjoying your patio in peace.
Understanding the nuances of brick walls, reinforcement, and professional techniques can make all the difference.
Read on to learn the details that keep your installation safe and lasting.
Step-by-Step: How to Properly Install a Retractable Awning on a Brick Wall (in 8 Clear Steps)
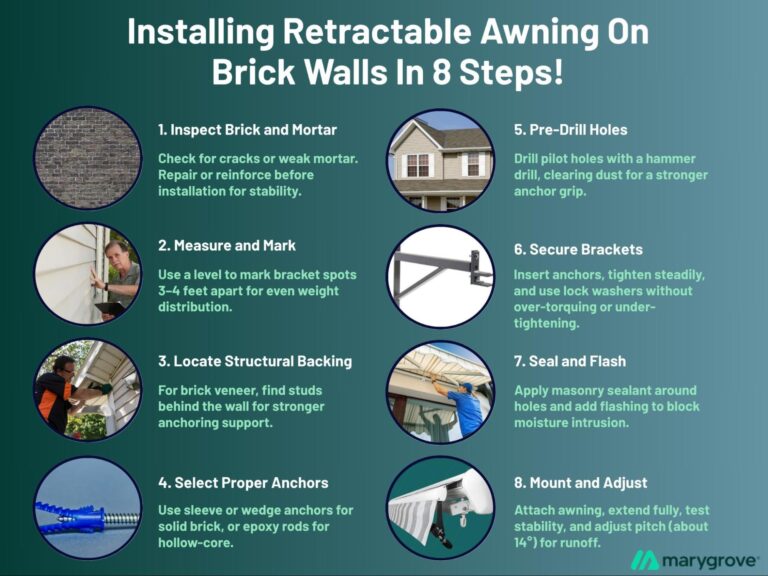
Installing an awning on brick demands precision. Follow these streamlined steps to ensure a secure, lasting setup without damaging your wall.
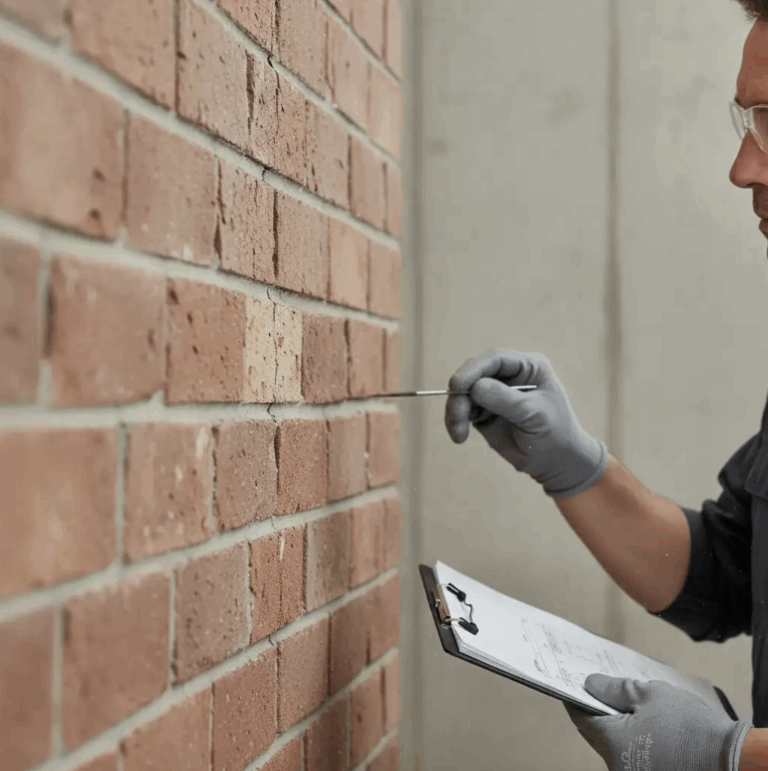
Inspect Your Brick and Mortar First
Check for cracks, spalling bricks, or weak mortar. Identify if it’s solid brick, veneer, or hollow-core. Weak walls require repair or reinforcement before drilling.
Addressing these issues upfront prevents anchor failures and sets a stable foundation for installation.
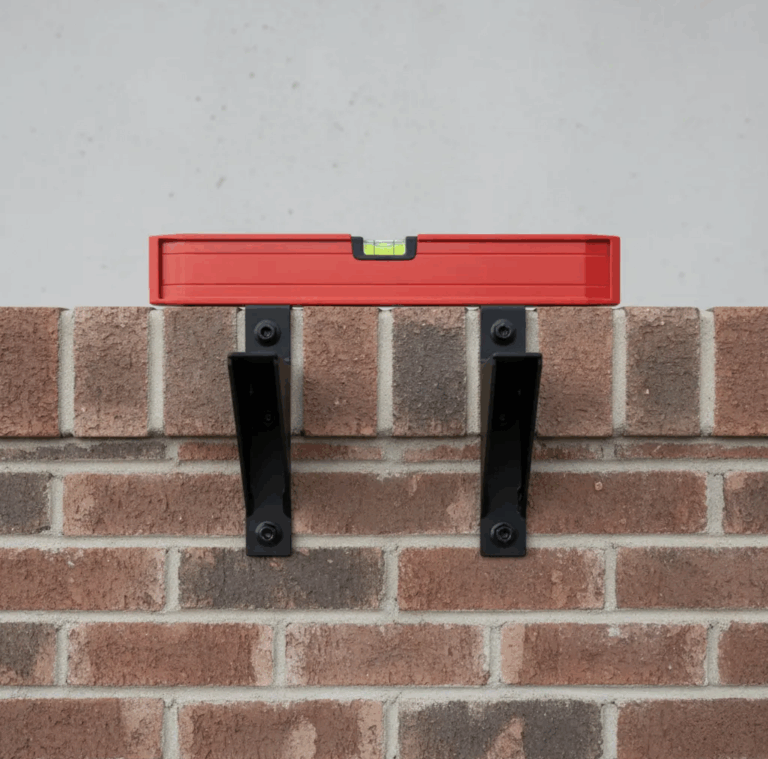
Measure and Mark Precisely
Use a level to mark bracket placement, keeping spacing consistent (every 3–4 feet). Accurate alignment prevents uneven load distribution that can strain awning arms.
Proper markings ensure a smooth installation and stable operation.
Helpful Resource → How to Measure for an Awning (Without Mistakes)
Locate Structural Backing (If Possible)
If you have brick veneer, find studs behind the wall using a stud finder.
Anchoring into framing strengthens the setup and avoids relying solely on decorative brick, which can’t handle heavy tension or wind.
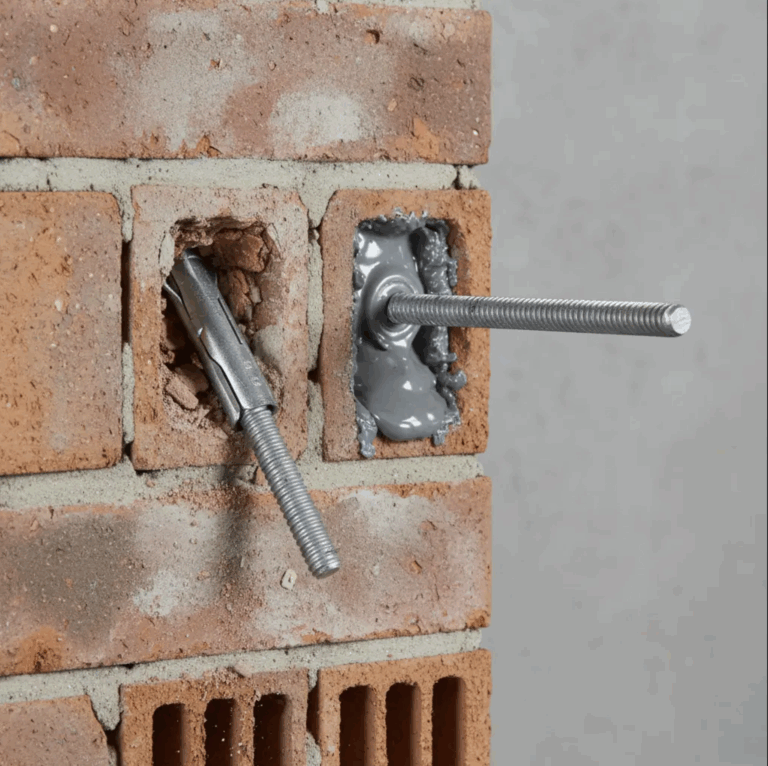
Choose the Correct Anchors
Use sleeve or wedge anchors for solid brick. For hollow-core, choose epoxy-set threaded rods for better hold.
Correct hardware prevents anchor slippage and avoids damage from improper expansion forces in brittle or hollow brick.
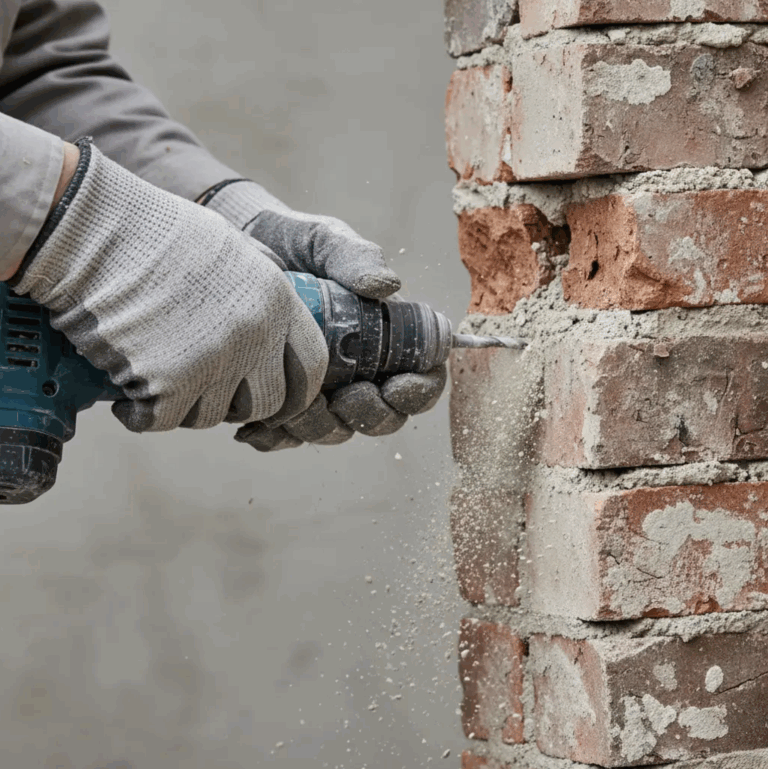
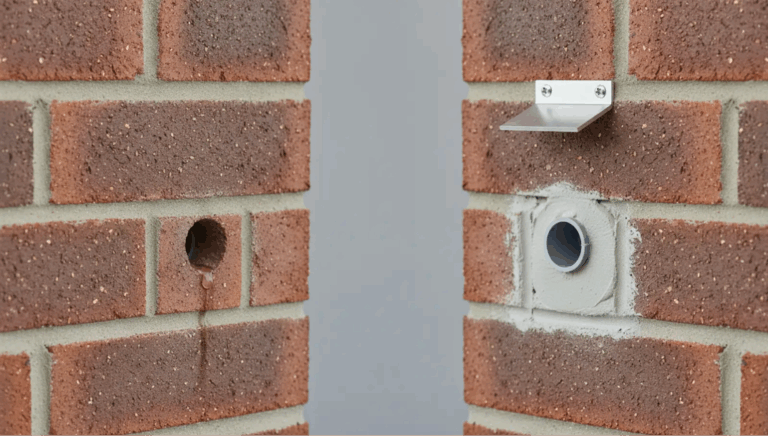
Pre-Drill Carefully
Drill pilot holes with a hammer drill and masonry bit.
Clear dust for better anchor grip and avoid forcing the bit, especially in older or fragile bricks, to prevent cracks.
Install and Secure Brackets
Insert anchors, tighten steadily, and use lock washers. Avoid over-torquing, which can crack brick or strip anchors, and under-tightening, which leaves brackets unstable.
Seal and Protect Mounting Points
Apply masonry sealant around holes and install flashing above brackets. This blocks moisture from entering and prevents long-term water damage that weakens brick and mortar.
Mount, Test, and Adjust Awning Pitch
Attach the awning, extend it fully, and check bracket stability. Adjust pitch (around 14 degrees) for proper water runoff and smooth operation.
With these steps complete, your awning is secure. Next, let’s look at common mistakes to avoid to keep it that way.
Mistakes That Lead to Costly Repairs (and How to Avoid Them)
Mistakes during installation aren’t always obvious at first, but they show up later as loosened anchors, cracks, or even collapsed awnings.
Here’s how to avoid the most common ones before they turn into costly repairs:
- Mortar joint mounting: Mortar is weaker than brick and can crumble under stress. Always anchor into solid brick for reliable support.
- Hollow brick issues: Standard anchors fail in hollow brick. Use epoxy-set anchors or threaded rods for better grip and strength.
- Skipping inspections: Cracked or spalled brick won’t hold properly. Check the wall’s condition and repair weak spots before drilling.
- No sealing or flashing: Unsealed holes let water seep in, weakening brick and mortar. Apply sealant and flashing to protect anchor points.
- Bracket misalignment: Poor measurements cause uneven tension on arms and brackets. Use a level and measure carefully to keep the awning balanced.
By steering clear of these common mistakes, you lay the groundwork for a secure and durable installation.
Next, let’s explore how a few smart reinforcements and add-ons can help your awning stay protected and perform at its best for years to come.
Helpful Resource → How Retractable Awnings Work + Key Features Explained
Ensuring Your Awning Lasts: Reinforcements and Smart Add-Ons
A well-installed awning is just the start.
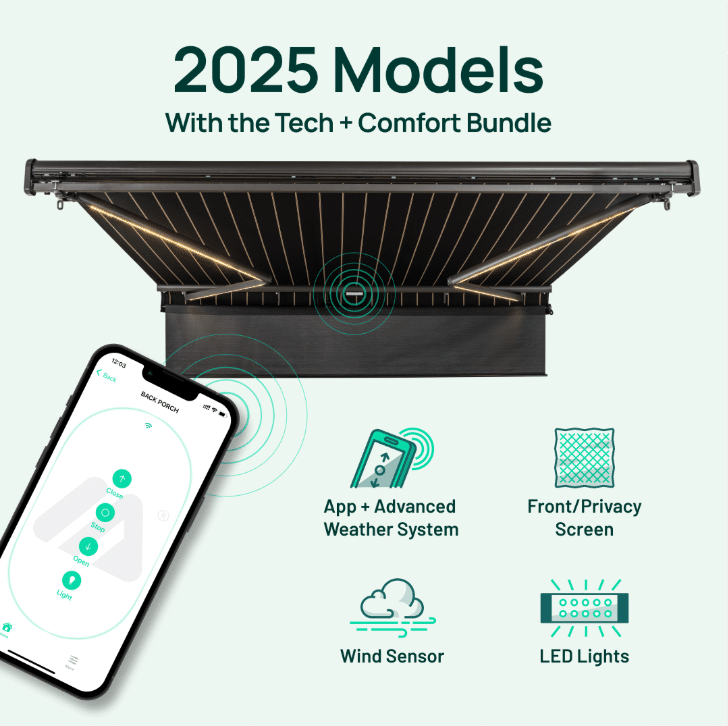
Proper reinforcements and a few smart add-ons can extend its life, keep it secure, and make maintenance easier over the years.
- Wind sensors: Automatically retract your awning in high winds to prevent strain on brackets and anchors.
- Regular inspections: Check anchors, brackets, and fabric annually for signs of loosening, wear, or weather damage.
- Enclosed cassette design: Protects fabric from sun, rain, and debris, preserving its color and condition for longer use.
- Optimal bracket spacing: Ensures even load distribution across your wall, reducing stress on individual anchor points.
- Seal upkeep: Reseal mounting points periodically to block moisture and protect your brick and mortar.
These simple measures keep your awning secure, functional, and looking its best, reducing long-term maintenance costs and avoiding preventable repairs.
By combining these reinforcements with regular upkeep, your awning can stay strong and dependable for years.
For even greater assurance, it’s worth considering how professional installation can eliminate risks and provide the precision and expertise that DIY efforts often lack.
Helpful Resource → How Long Do Awnings Last? Lifespan by Type & Care Tips
Why Professional Installation Prevents DIY Disasters
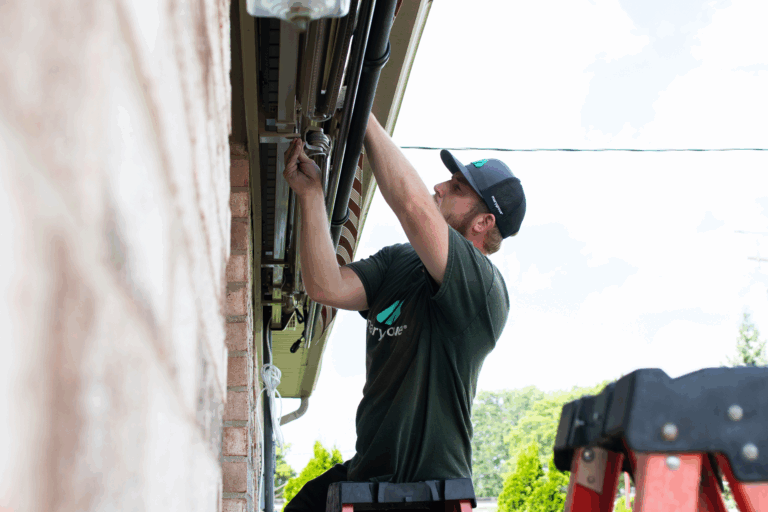
Taking on an awning installation yourself may seem straightforward, but mounting one on brick presents unique challenges that can quickly turn costly if mistakes are made.
Professionals bring the knowledge, tools, and experience necessary to avoid these issues and ensure a safe, lasting setup.
Brick Veneer Risks
Brick veneer is decorative and not designed to support heavy loads.
Engineers warn that securing an awning directly to veneer can lead to anchor loosening and even brick separation over time.
Professionals know how to tie into structural framing behind veneer, which creates a far stronger and safer installation.
Specialized Tools and Techniques
Proper installation often requires epoxy anchoring systems, torque-calibrated drills, and precision leveling equipment.
These tools ensure anchors are properly seated and brackets are aligned to handle real-world forces like wind and tension, capabilities that go beyond typical DIY setups.
Avoiding Anchor Failures in Wind
Strong gusts place enormous leverage on awning brackets.
When improperly secured, anchors can rip out, damaging both the awning and the wall. Experienced installers understand how to reinforce mounting points and use the correct hardware for each brick type.
Expertise and Peace of Mind
Professional teams not only handle installation accurately but also provide warranties that protect your investment.
Their training ensures precise alignment, secure fastening, and weatherproof sealing that most DIY efforts overlook.
And if you do mess up the wall, repairs aren’t cheap, brick restoration typically costs between $700 and $2,000, with extensive work potentially exceeding $4,000
Opting for professional installation ensures your awning is not just functional but also safe, stable, and built to last without risking your brickwork.
Final Takeaway: Safe Mounting = Lasting Shade and Zero Brick Damage
A secure retractable awning installation begins with knowing your wall, using the right anchors, and following precise steps.
Proper techniques prevent cracked bricks, loose mortar, and costly repairs, ensuring both safety and durability.
Professional installation adds another layer of protection.
With expert assessment, AR-assisted placement, and proven hardware, your awning can handle wind, weight, and daily use without risking your wall.
Features like wind sensors and thorough sealing further extend its lifespan and keep your brickwork protected.
Your home’s exterior deserves care and precision, not guesswork.
By pairing the right approach with professional expertise, you can enjoy lasting shade and confidence knowing your wall is secure.
Ready to transform your outdoor space?
Explore Marygrove retractable awnings and schedule a professional installation for a safe, hassle-free upgrade built to protect your brick and deliver comfort for years to come.